

Steam Game Recording Support for War Thunder!
Date: 2025-09-26 12:50:08
Steam Game Recording Support for War Thunder!
With this week’s release of Tusk Force, we added support for Steam’s new Game Recording feature to War Thunder. This is a built-in recording function on Steam, where you can save videos and share them with your friends.
Today we wanted to make a simple step-by-step guide on how you can record your very own War Thunder videos, right here on Steam!
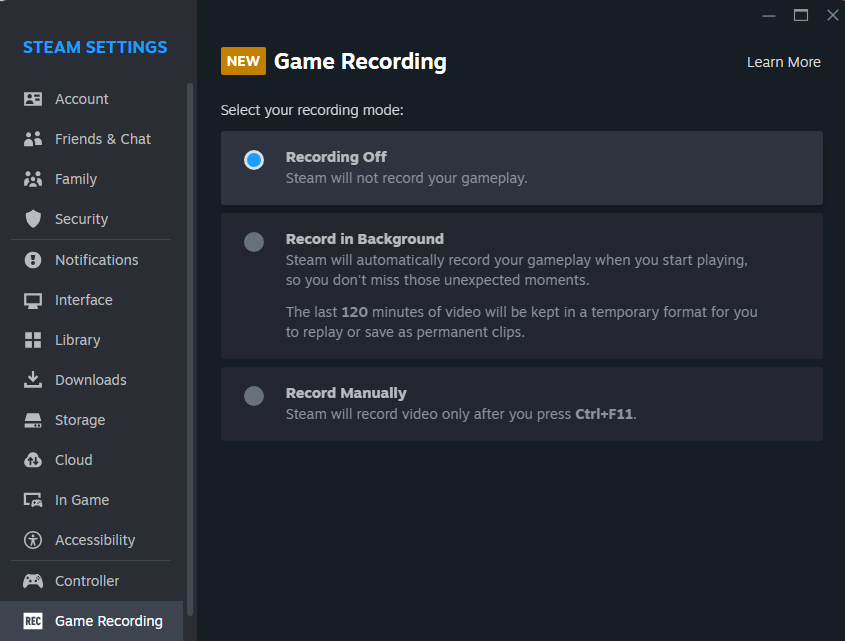
Step 1: Enable Steam Game Recording
By default, recording will be off. You’ll need to turn on Game Recording, there are two ways to get to this setting:
- From the Steam client: Steam > Settings > Game Recording
or
- From in-game: Open the Steam overlay (Shift + Tab) and click on the Game Recording button at the bottom
Once you navigate to this setting, you can either choose “Record in Background” or “Record Manually”.
When you turn on one of the recording settings, Steam will show you several recording options. You can change the keybinds, set the quality, choose the recording folder, encoding, frame rate, delete recorded videos to free up drive space, and more. It’s up to you to decide which settings work best for you.
Step 2: Recording War Thunder videos
If you’ve enabled “Record in Background”, War Thunder will be recorded while you have the game open. To get a visual sense of what occurred while you were playing, open your Steam overlay and a timeline will be shown at the top. Here you can see various icons and colors of what happened in your session.

The “Record in Background” option will record the last 120 minutes of video in a temporary format. The “Record Manually” option only starts recording when you press Ctrl + F11 (default key).
Important: If you’d like to keep a section of gameplay, or want to to share it with your friends, you’ll need to create clips of the recorded gameplay on the timeline. More on how to do that below.
Understanding the Timeline colors
The timeline shows different colors, each with a meaning so that you can identify parts of your recording:
- Light blue = playing in a battle
- Light blue striped = in the spawn screen in a battle
- Dark blue = loading in or out of a battle
- Dark blue striped = in the hangar
Icons on the timeline for important events
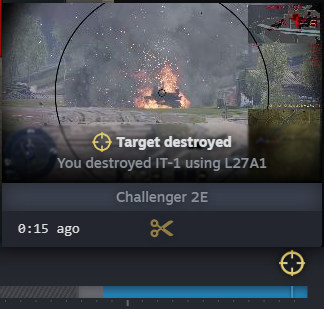
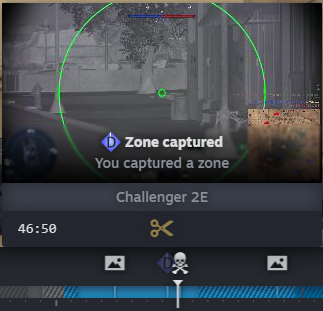
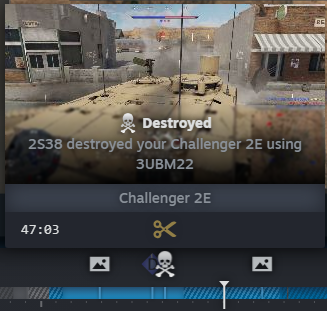
When you destroy an enemy, it shows a yellow sight. You can hover over this icon to see the ammo type you used, and the enemy you destroyed. | When you capture a zone, it will show a “D” point icon. You can hover over this icon to see more details about your capture. | When you get destroyed, it will show a skull and bones icon. You can hover over this icon to see the exact vehicle and ammo that destroyed you. |
Placing markers
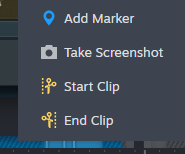
Want to remember a significant moment in battle? You can place your own markers on the timeline so that you can come back to the recording later to rewatch or make a clip. Simply right-click on the timeline and place the marker.

Taking Screenshots
Prefer to take a screenshot instead? You can take a screenshot of a moment in the recording. Simply right-click on the timeline and select screenshot, which will save it to your usual Steam screenshot folder.

Step 3: Creating clips of your recordings
So you’ve just had the battle of your life, you recorded it with this new feature and want to share it with your friends. This can be done by creating clips of the recordings. To create a clip, access the timeline either from your Steam library (post-game summary) or open the Steam overlay as mentioned above. Then:
- Right click on the timeline and click “Start Clip”.
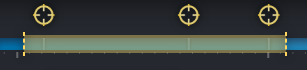
2. Drag the yellow bar on the timeline to highlight the section that you want to save as a clip. Here, we’ve highlighted the timeframe where we destroyed three enemies.
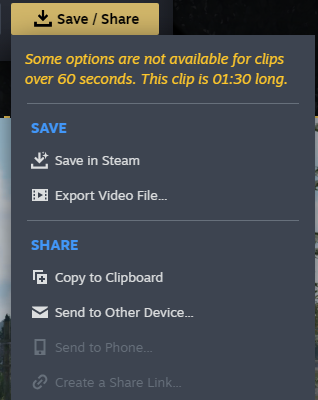
3. Click on the yellow “Save / Share” button and choose where you’d like to save it. Tada! If you pick the “Export Video file...” option, the .mp4 clip will be exported to your PC and then you can share it with your friends in all your usual places, such as Discord.
That’s pretty much it! We hope this basic guide clarified how to enable recording and how to record War Thunder videos to share with your friends. Give it a try, look around the settings and see what’s best for you, and we look forward to seeing the clips that you’ve shared on all platforms!